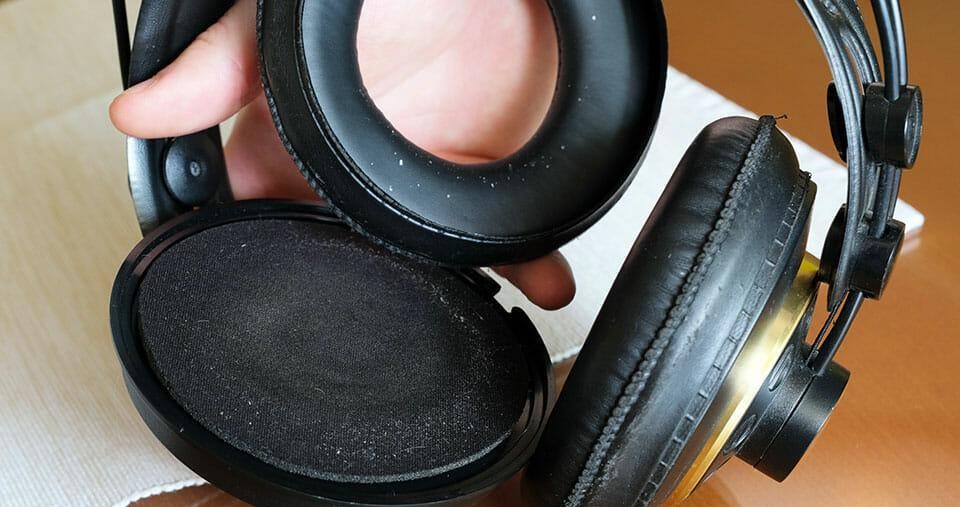
Headphones are an essential part of our daily lives, whether we use them for music, gaming, or work. Over time, the pads on your headphones can accumulate dirt, sweat, oils, and even bacteria, which can degrade sound quality, comfort, and hygiene. Knowing how to clean headphone pads properly is crucial for maintaining their performance and extending their lifespan. In this comprehensive guide, we will explore the importance of cleaning your headphone pads, the best methods for cleaning different types of pads, how often you should clean them, and tips for maintaining them in the best possible condition.

Why Is It Important to Clean Your Headphone Pads Regularly?
Regular cleaning of your headphone pads is not just about aesthetics; it’s essential for several reasons:
Hygiene: Headphone pads come into direct contact with your skin and hair, collecting sweat, oils, and bacteria over time. Regular cleaning helps prevent skin irritation and infections.
Sound Quality: Dirt and debris can block the sound output and reduce the effectiveness of noise-canceling features. Clean pads ensure optimal sound quality.
Longevity: Sweat and oils can cause the materials in headphone pads to break down faster. Regular cleaning helps preserve the pads, extending their life and maintaining comfort.
Odor Prevention: Over time, accumulated sweat and oils can cause unpleasant odors in your headphone pads. Regular cleaning keeps them fresh and pleasant to use.
What Are the Best Methods for Cleaning Different Types of Headphone Pads?

Different types of headphone pads require different cleaning methods to ensure they are thoroughly cleaned without damaging the materials. Here are the best methods for cleaning various types of headphone pads:
Cleaning Leather or Faux Leather Pads
Leather and faux leather pads are popular for their durability and comfort, but they require careful cleaning to avoid damage.
Step 1: Remove the Pads: If possible, remove the pads from the headphones to make cleaning easier and to avoid damaging the electronics.
Step 2: Wipe with a Damp Cloth: Use a soft, damp cloth (preferably microfiber) to gently wipe the surface of the pads. Avoid using too much water, as this can damage the leather.
Step 3: Use a Leather Cleaner: Apply a small amount of leather cleaner to the cloth and gently rub it into the pads. This helps to clean and condition the leather, keeping it soft and supple.
Step 4: Dry the Pads: After cleaning, use a dry microfiber cloth to remove any excess moisture. Allow the pads to air dry completely before reattaching them to your headphones.
Cleaning Foam or Fabric Pads
Foam and fabric pads are commonly used in over-ear and on-ear headphones, offering comfort and breathability.
Step 1: Remove the Pads: Carefully remove the pads from the headphones to avoid getting water on the electronics.
Step 2: Wash with Soap and Water: Mix a small amount of mild soap with warm water. Dip a soft cloth into the soapy water and gently scrub the fabric pads. Avoid soaking the pads, as too much water can damage the foam inside.
Step 3: Rinse and Squeeze: Rinse the cloth with clean water and gently wipe the pads to remove any soap residue. Gently squeeze the pads to remove excess water without wringing them out.
Step 4: Air Dry: Allow the pads to air dry completely in a well-ventilated area. Do not use a hair dryer or place them in direct sunlight, as this can cause the fabric to shrink or the foam to become misshapen.
Cleaning Memory Foam Pads
Memory foam pads conform to the shape of your ears, providing a comfortable and secure fit. However, they can be delicate and require gentle cleaning.
Step 1: Remove the Pads: Remove the memory foam pads from the headphones to prevent moisture from reaching the electronics.
Step 2: Spot Clean with Mild Soap: Dampen a soft cloth with a mixture of mild soap and water. Gently dab the surface of the memory foam pads, focusing on any stained or dirty areas.
Step 3: Avoid Soaking: Do not immerse the memory foam pads in water, as this can damage the foam’s structure.
Step 4: Air Dry Thoroughly: Place the pads in a well-ventilated area and allow them to air dry completely before reattaching them to your headphones.
Special Tips for Cleaning Wireless Headphones Pads
Wireless headphones often have more delicate components, so extra care is needed when cleaning their pads.
Avoid Moisture Near Electronics: When cleaning wireless headphone pads, be extra cautious to keep moisture away from the electronic components. Always remove the pads before cleaning.
Use Antibacterial Wipes: For a quick clean, use alcohol-free antibacterial wipes to sanitize the pads. Ensure the wipes are not too wet and avoid wiping the internal parts of the headphones.
Regular Cleaning Routine: Establish a regular cleaning routine, especially if you use your wireless headphones during workouts or in hot weather. This prevents sweat buildup and prolongs the life of the pads.
How Often Should You Clean Your Headphone Pads?
The frequency of cleaning your headphone pads depends on how often you use them and in what environments. Here are some guidelines:
Daily Users: If you use your headphones daily, especially during workouts or commuting, it’s a good idea to wipe down the pads with a damp cloth or antibacterial wipe after each use. A more thorough cleaning should be done weekly.
Moderate Users: For those who use their headphones a few times a week, a thorough cleaning every two weeks is recommended. This helps prevent dirt and oils from building up.
Occasional Users: If you use your headphones infrequently, cleaning them once a month should suffice. However, always inspect the pads before use to ensure they are clean and free of debris.
What Are the Best Practices for Maintaining Headphone Pads?
In addition to regular cleaning, there are several best practices you can follow to maintain your headphone pads and extend their lifespan.
Store Properly: When not in use, store your headphones in a protective case to keep them safe from dust, moisture, and physical damage.
Avoid Excessive Moisture: Try to keep your headphones away from excessive sweat and water. If you do use them in these conditions, make sure to clean and dry the pads thoroughly afterward.
Inspect Regularly: Regularly check your headphone pads for signs of wear and tear. If the pads are showing signs of cracking, peeling, or losing their shape, it may be time to replace them.
Rotate Pads: If your headphones come with extra pads, consider rotating them. This allows each set to dry out and recover between uses, extending their overall lifespan.
Use Covers: Consider using removable covers on your headphone pads. These can be easily removed and washed, protecting the pads from direct contact with dirt and oils.
Conclusion
Keeping your headphone pads clean is essential for maintaining their performance, comfort, and longevity. By following the methods outlined in this guide, you can ensure your headphone pads remain fresh, hygienic, and in top condition for years to come. Regular cleaning, combined with proper maintenance practices, will help you enjoy your headphones to the fullest, whether you’re listening to music, gaming, or working.
FAQs
Can I use household cleaners on my headphone pads?
It’s best to avoid using harsh household cleaners on your headphone pads, as they can damage the materials. Stick to mild soap, water, and specific leather or fabric cleaners to ensure your pads remain in good condition.
How do I know when it’s time to replace my headphone pads?
You should replace your headphone pads if they show signs of cracking, peeling, flattening, or losing their shape. If they no longer provide the same comfort or sound isolation, it’s a clear sign that replacement is needed.
What should I do if my headphone pads are damaged during cleaning?
If your headphone pads are damaged during cleaning, consider replacing them with new ones. Many manufacturers offer replacement pads, or you can find compatible third-party options. Avoid using damaged pads, as they can affect sound quality and comfort.


